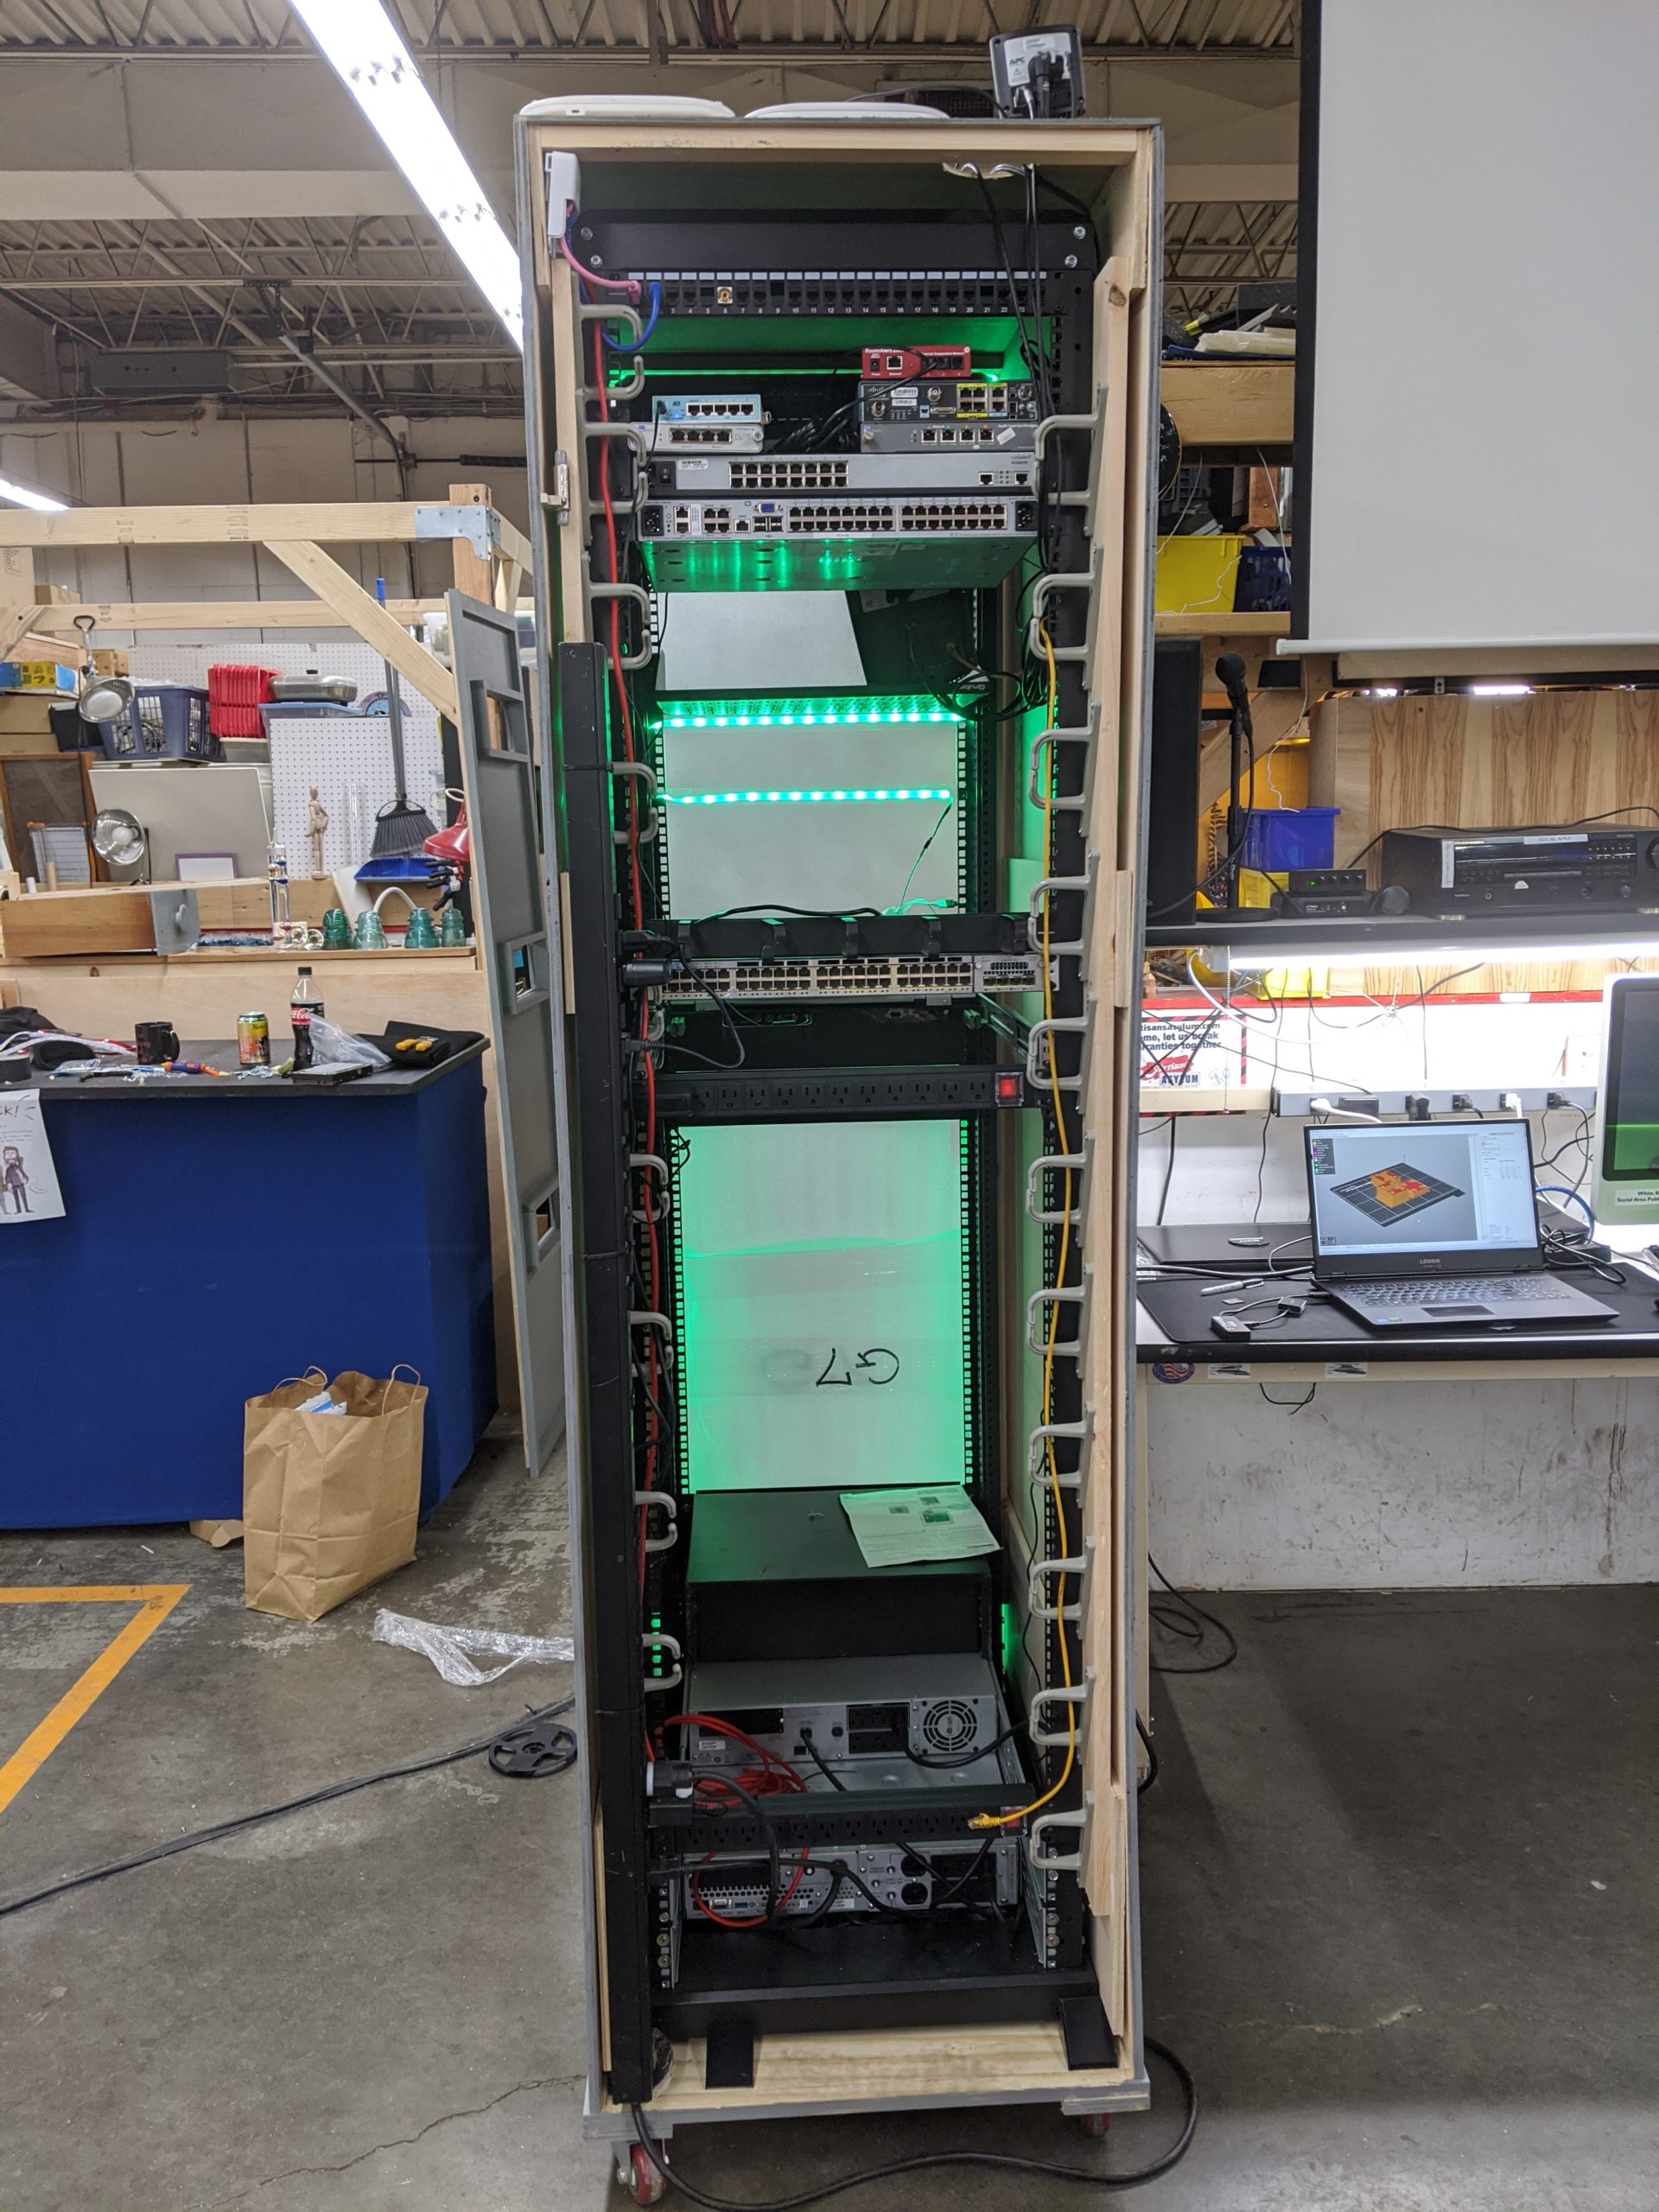
This is my playland or what I call YoloColo.It’s a pretty neat set up that I designed myself.


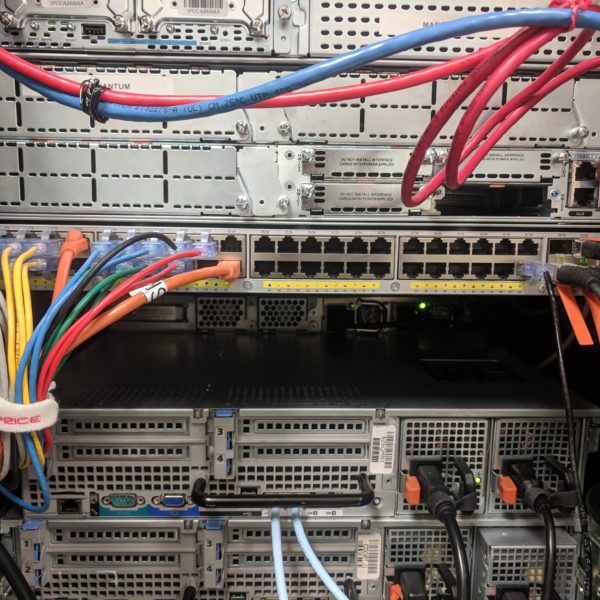
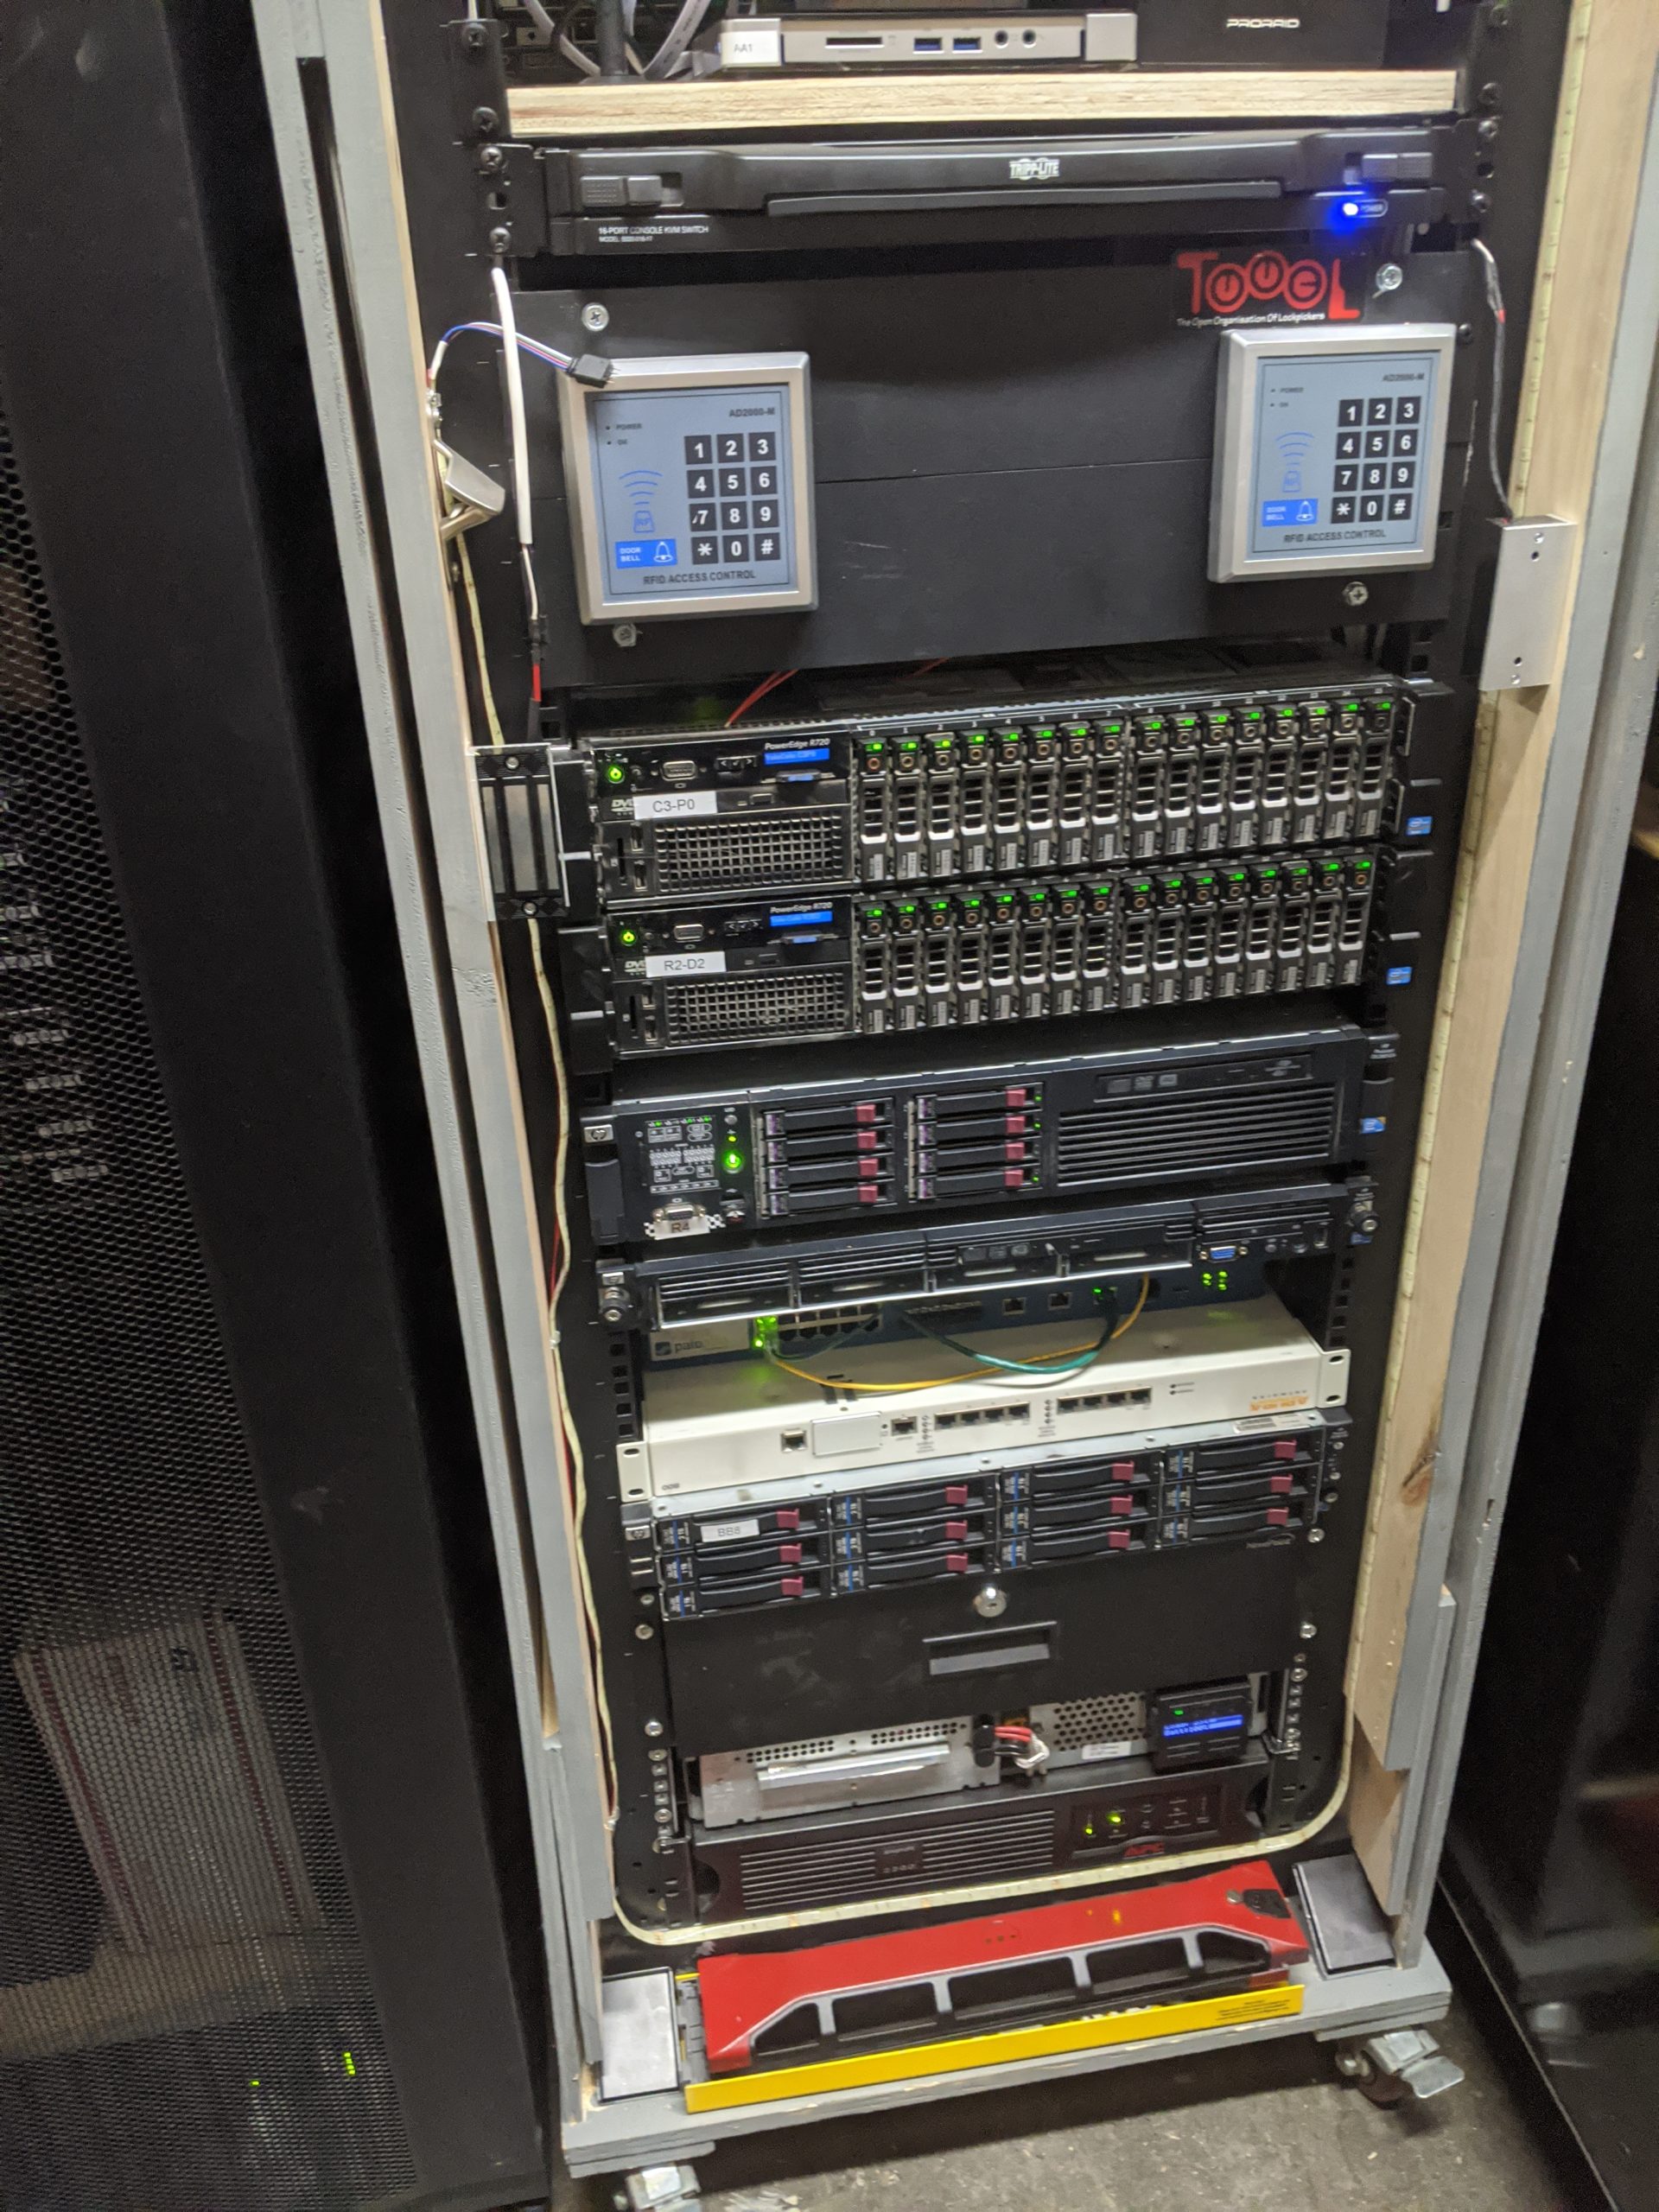
Rack layout
As you can see, I built a custom rack. This is the stupidest thing I did in this entire process of moving out of the old DC and into my maker space. I had this “vision” to make it looks like a Star Trek computer core that why it’s that StarShip gray color.
This turned into a GIANT pain in the ass. I had this all in my brain and nothing on paper. Again a huge mistake but in the end, it worked out. I do not recommend for anyone looking to get into creating your own system!
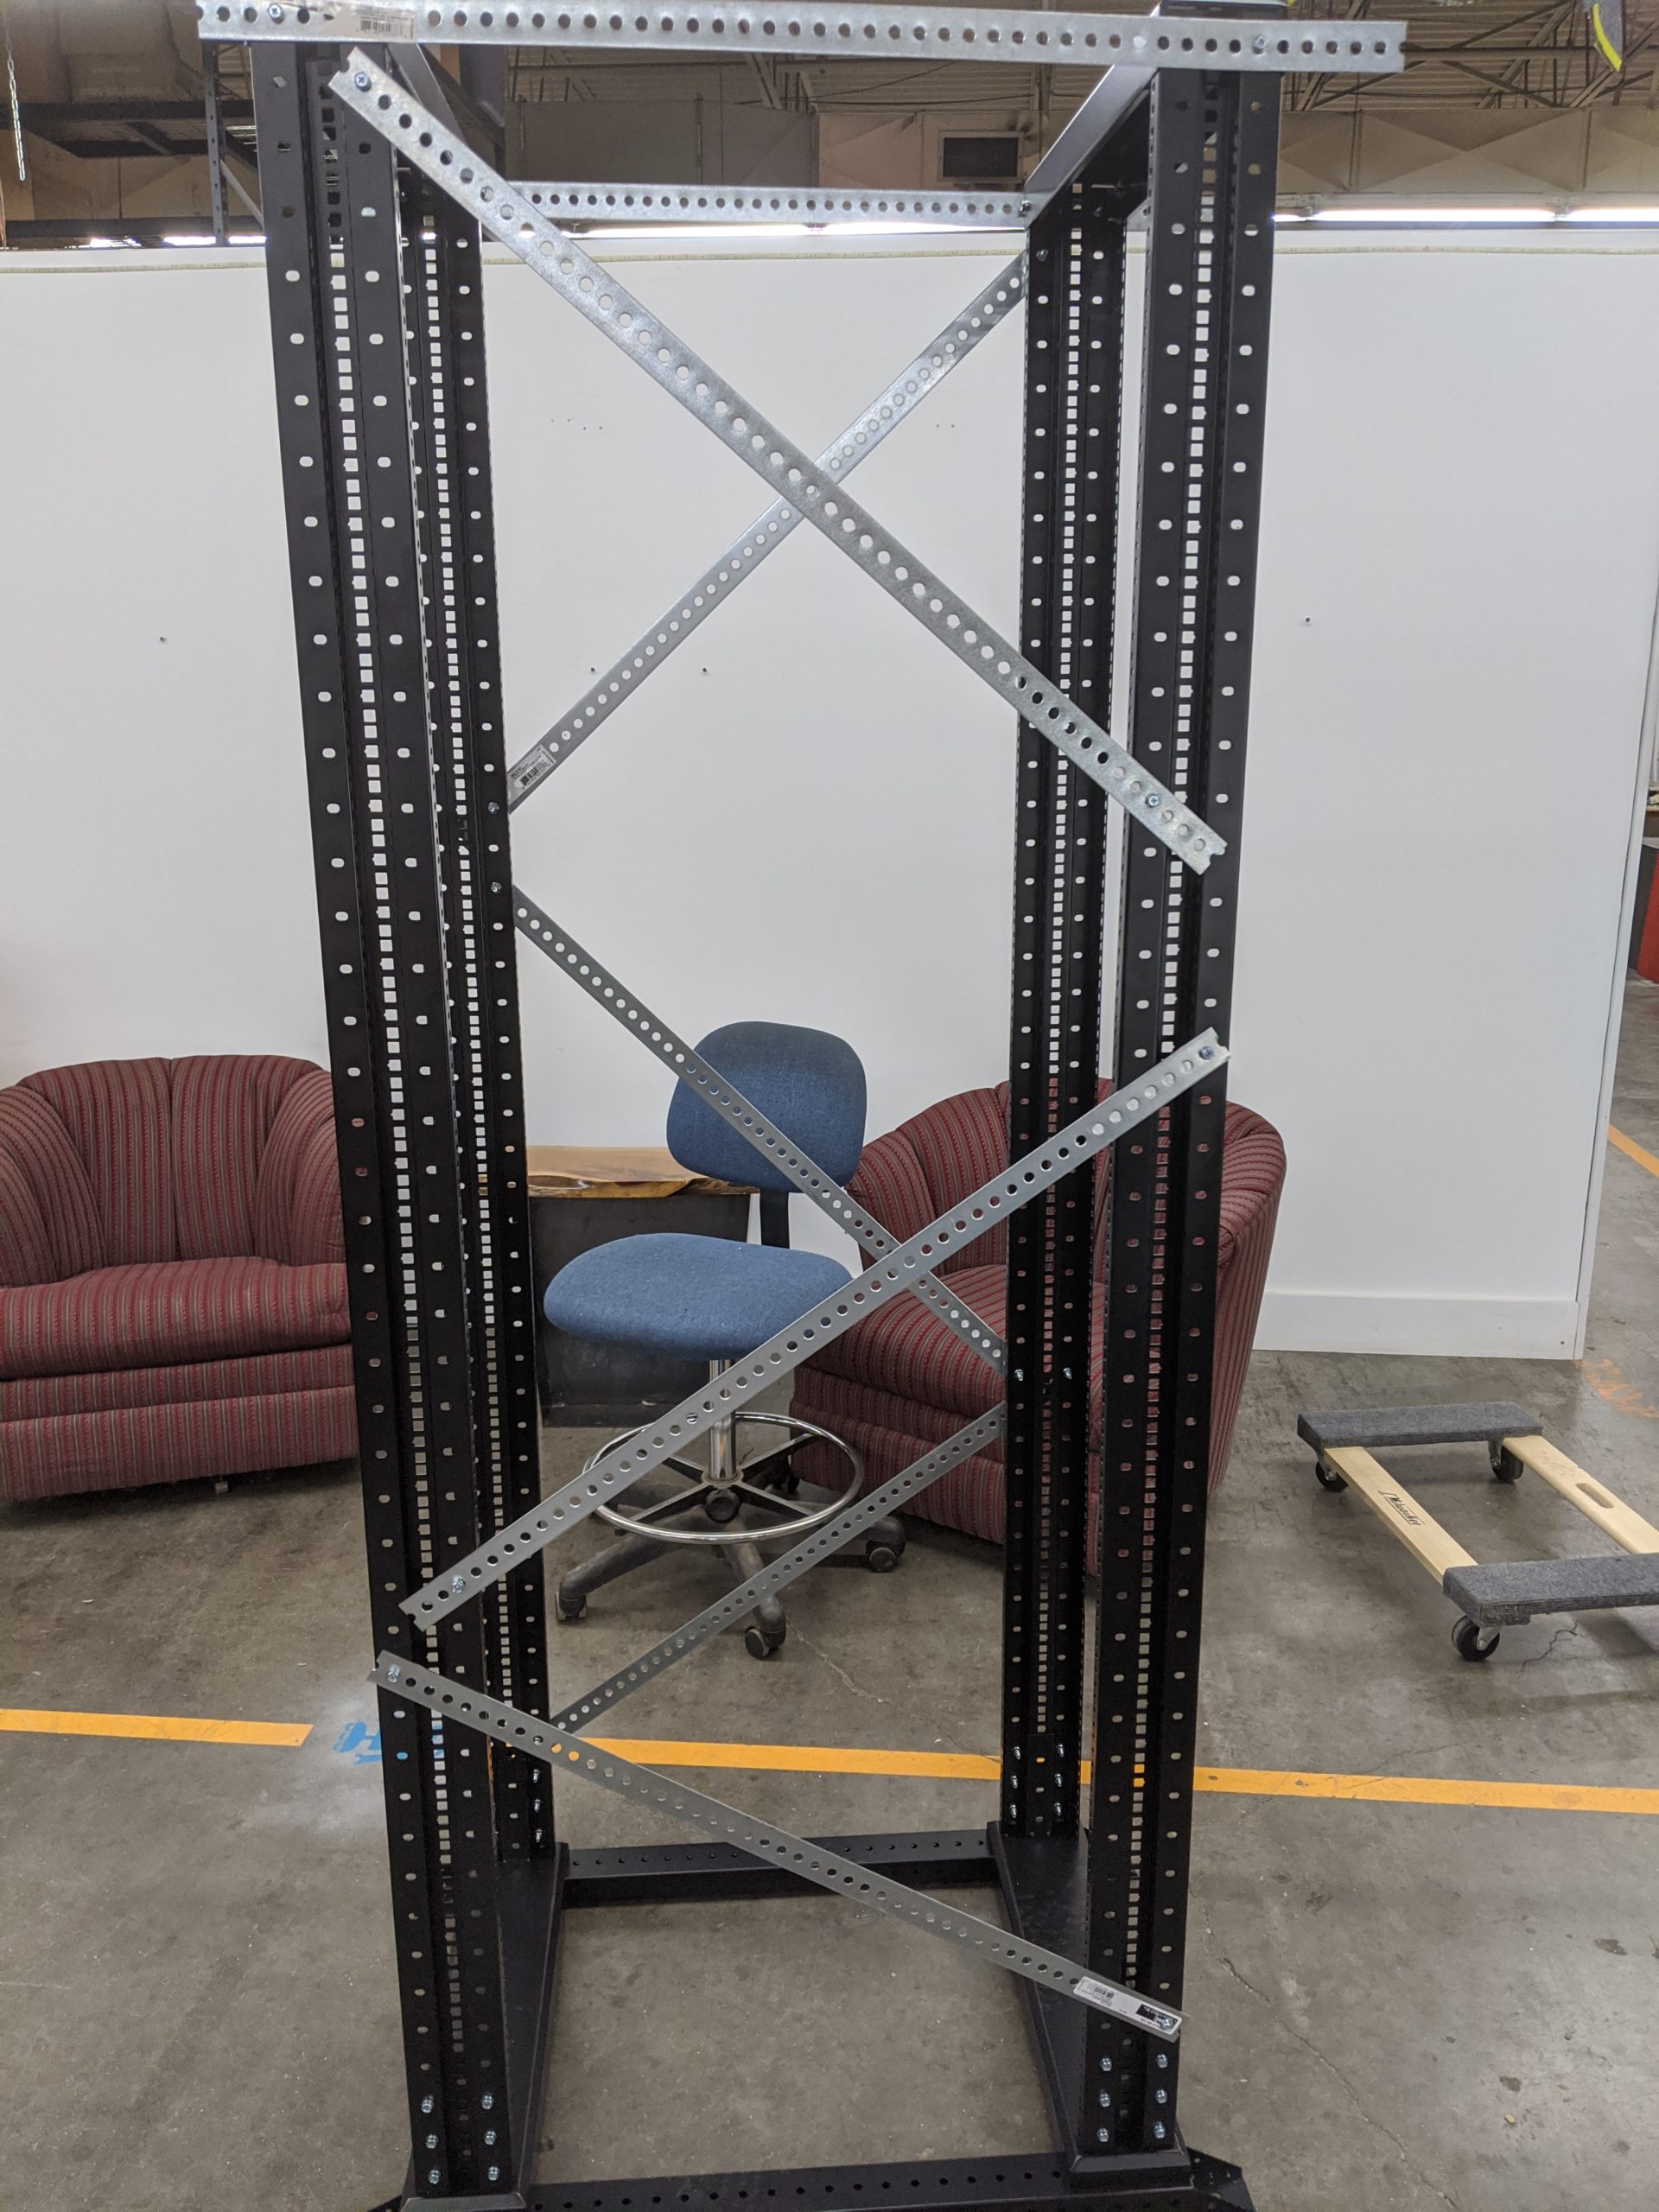
The Frame:
Here is what I started with. As you can see it is not very square and has some structural issues. The L brackets they gave me were not going to work sadly as they would get in the way and take up U’s


Begin terrible idea number 1: Attach the L brackets at strange angles with the “L bottom” facing externally. While it was technically square, it was very janky (as my girlfriend pointed out). Therefore, this didn’t last very long but it did give me some ideas for phase 2 of squaring off the frame.
Describe squaring up solution
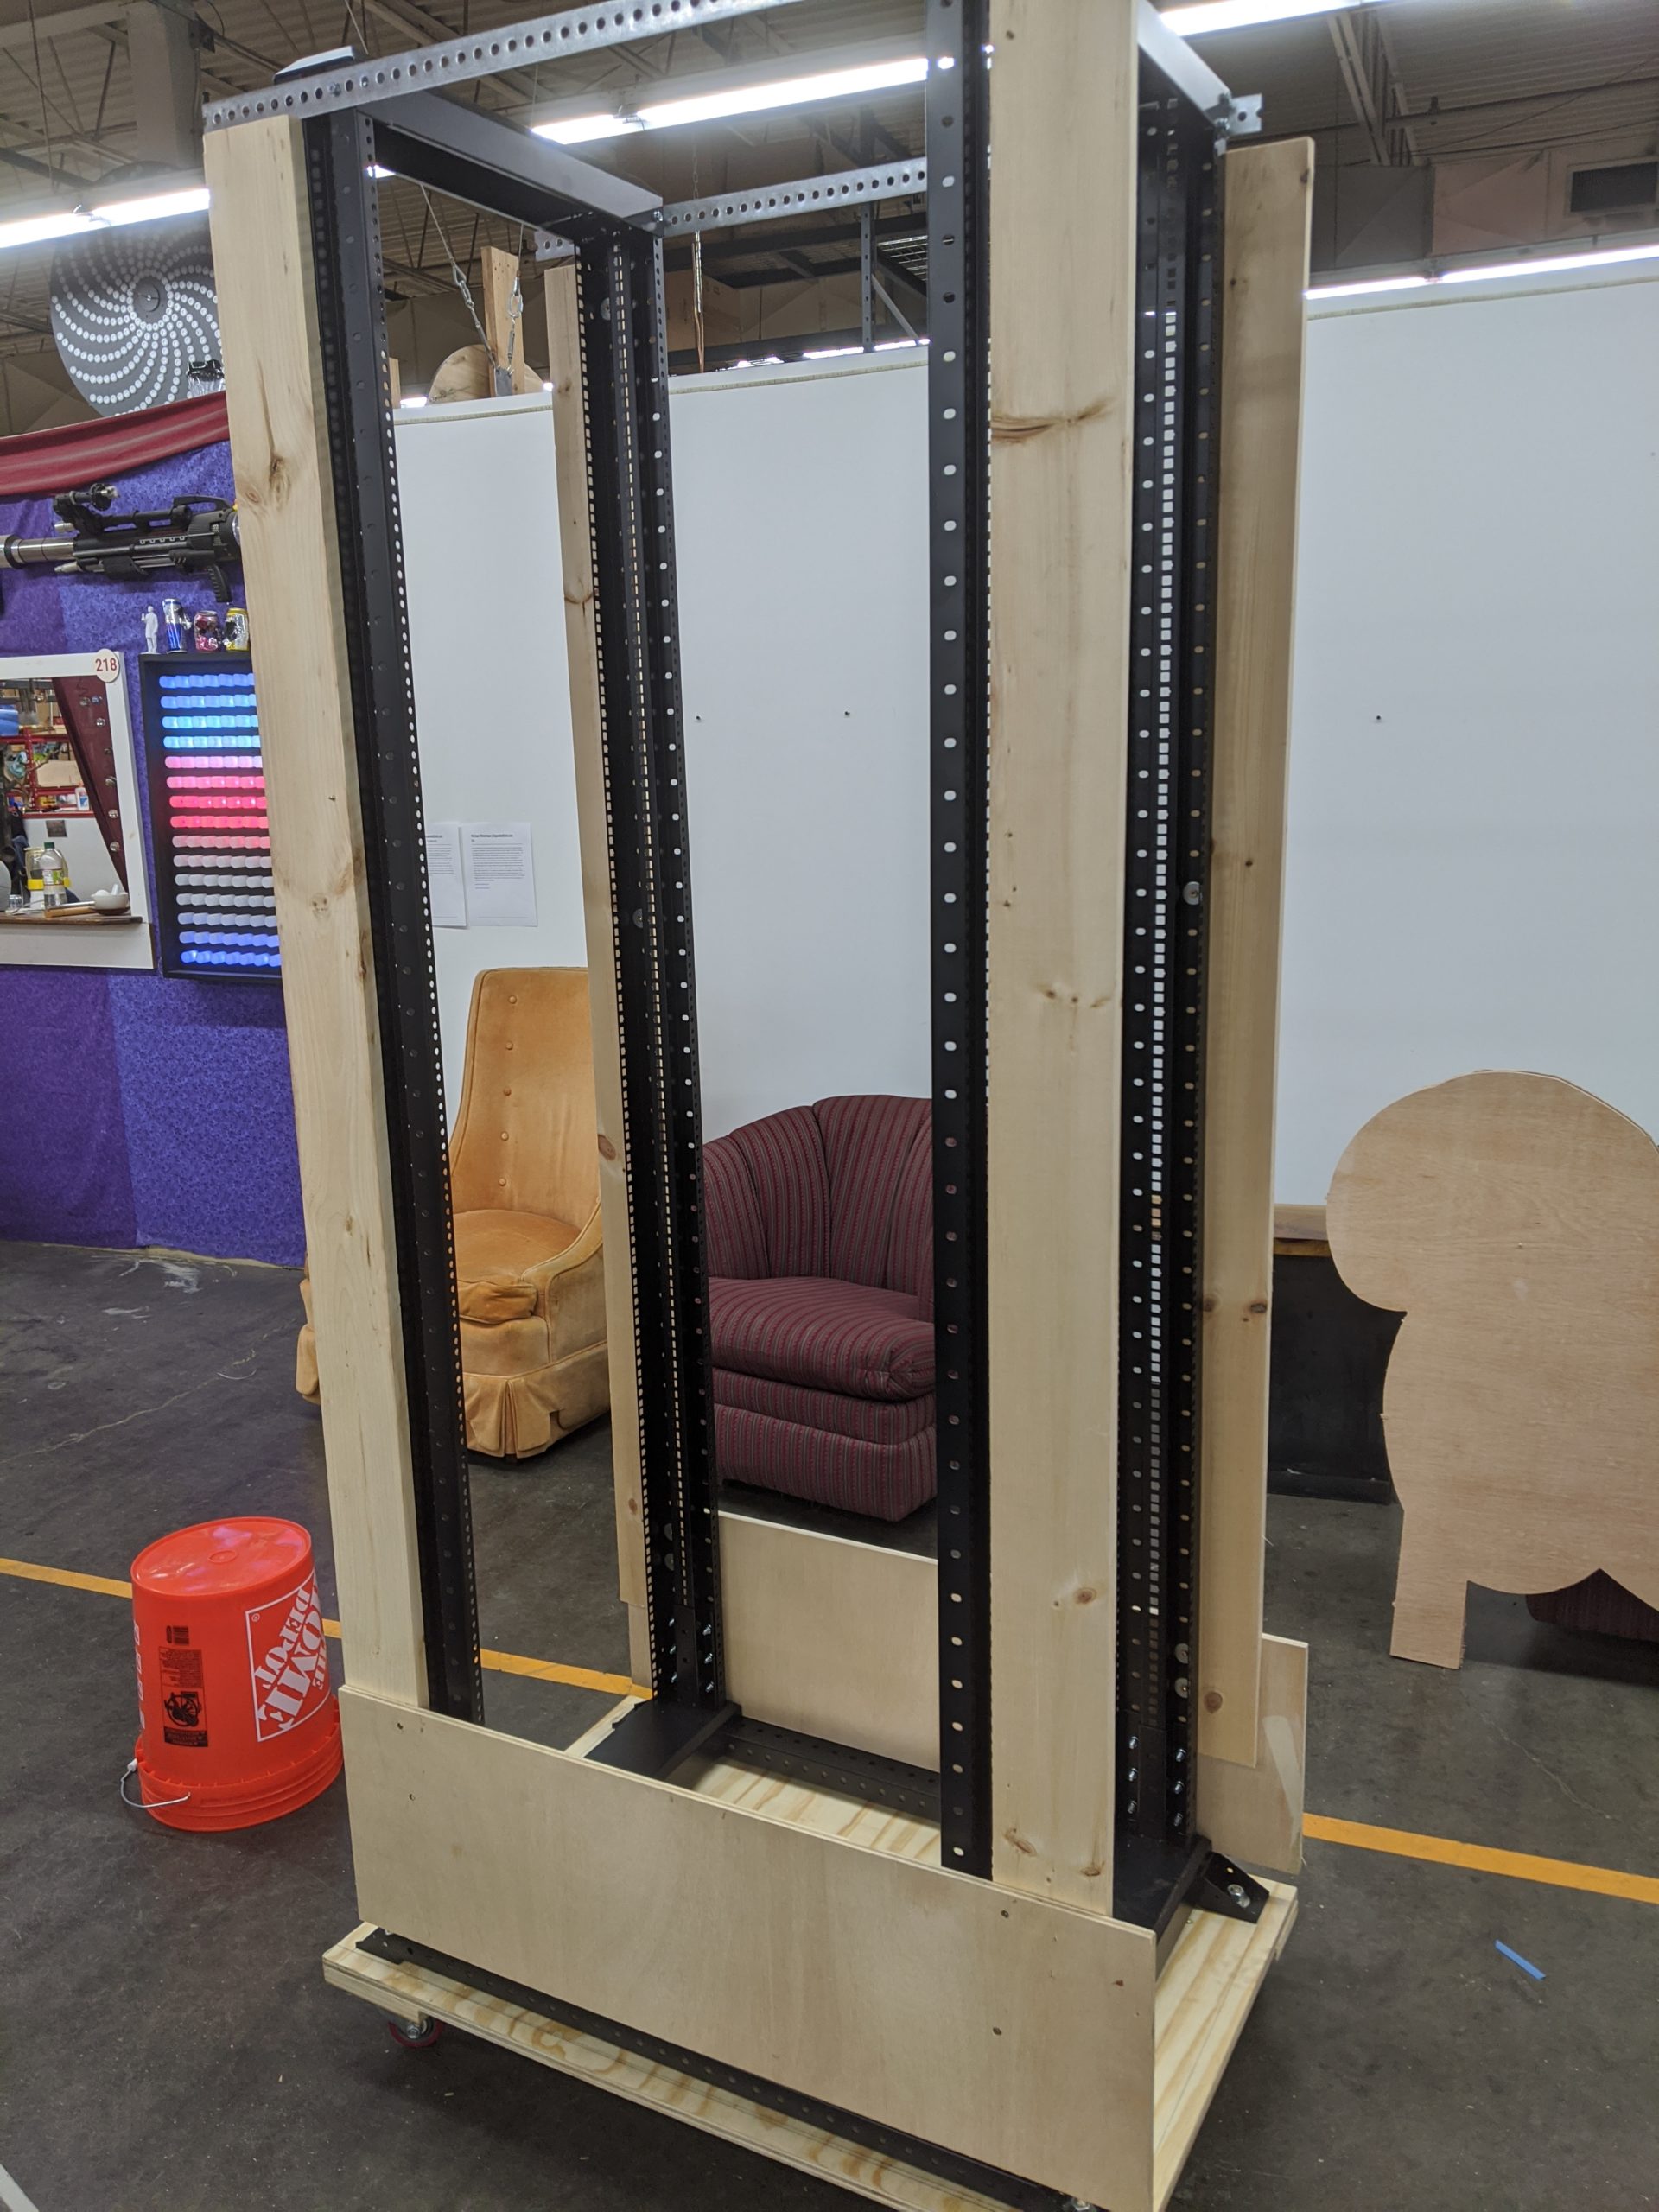
The Base
Good idea number 1: Use what you have lying around. I found some 3/4 ply lying around, so I decided to make this the base. I added 500 pounds (0.23 t) casters to it as well.


The Walls
Fuck up number 1 (and why you should ALWAYS draw up a plan before starting): As I began to add the walls and other support structures, I realized that I failed to take into account the door or the back of the rack where the vertical PDUs will live. I had to “add” to the size of the overall rack to account for this.
It’s at this point I really wished I got a rack off crag list.
Fuck up number 2: I really wanted the walls to be removable so that I could have easy access to all parts. However, this idea died very quickly when I realized just how much work would actually be involved. In the end, I just used bolts to attach the walls to the overall rack frame.
t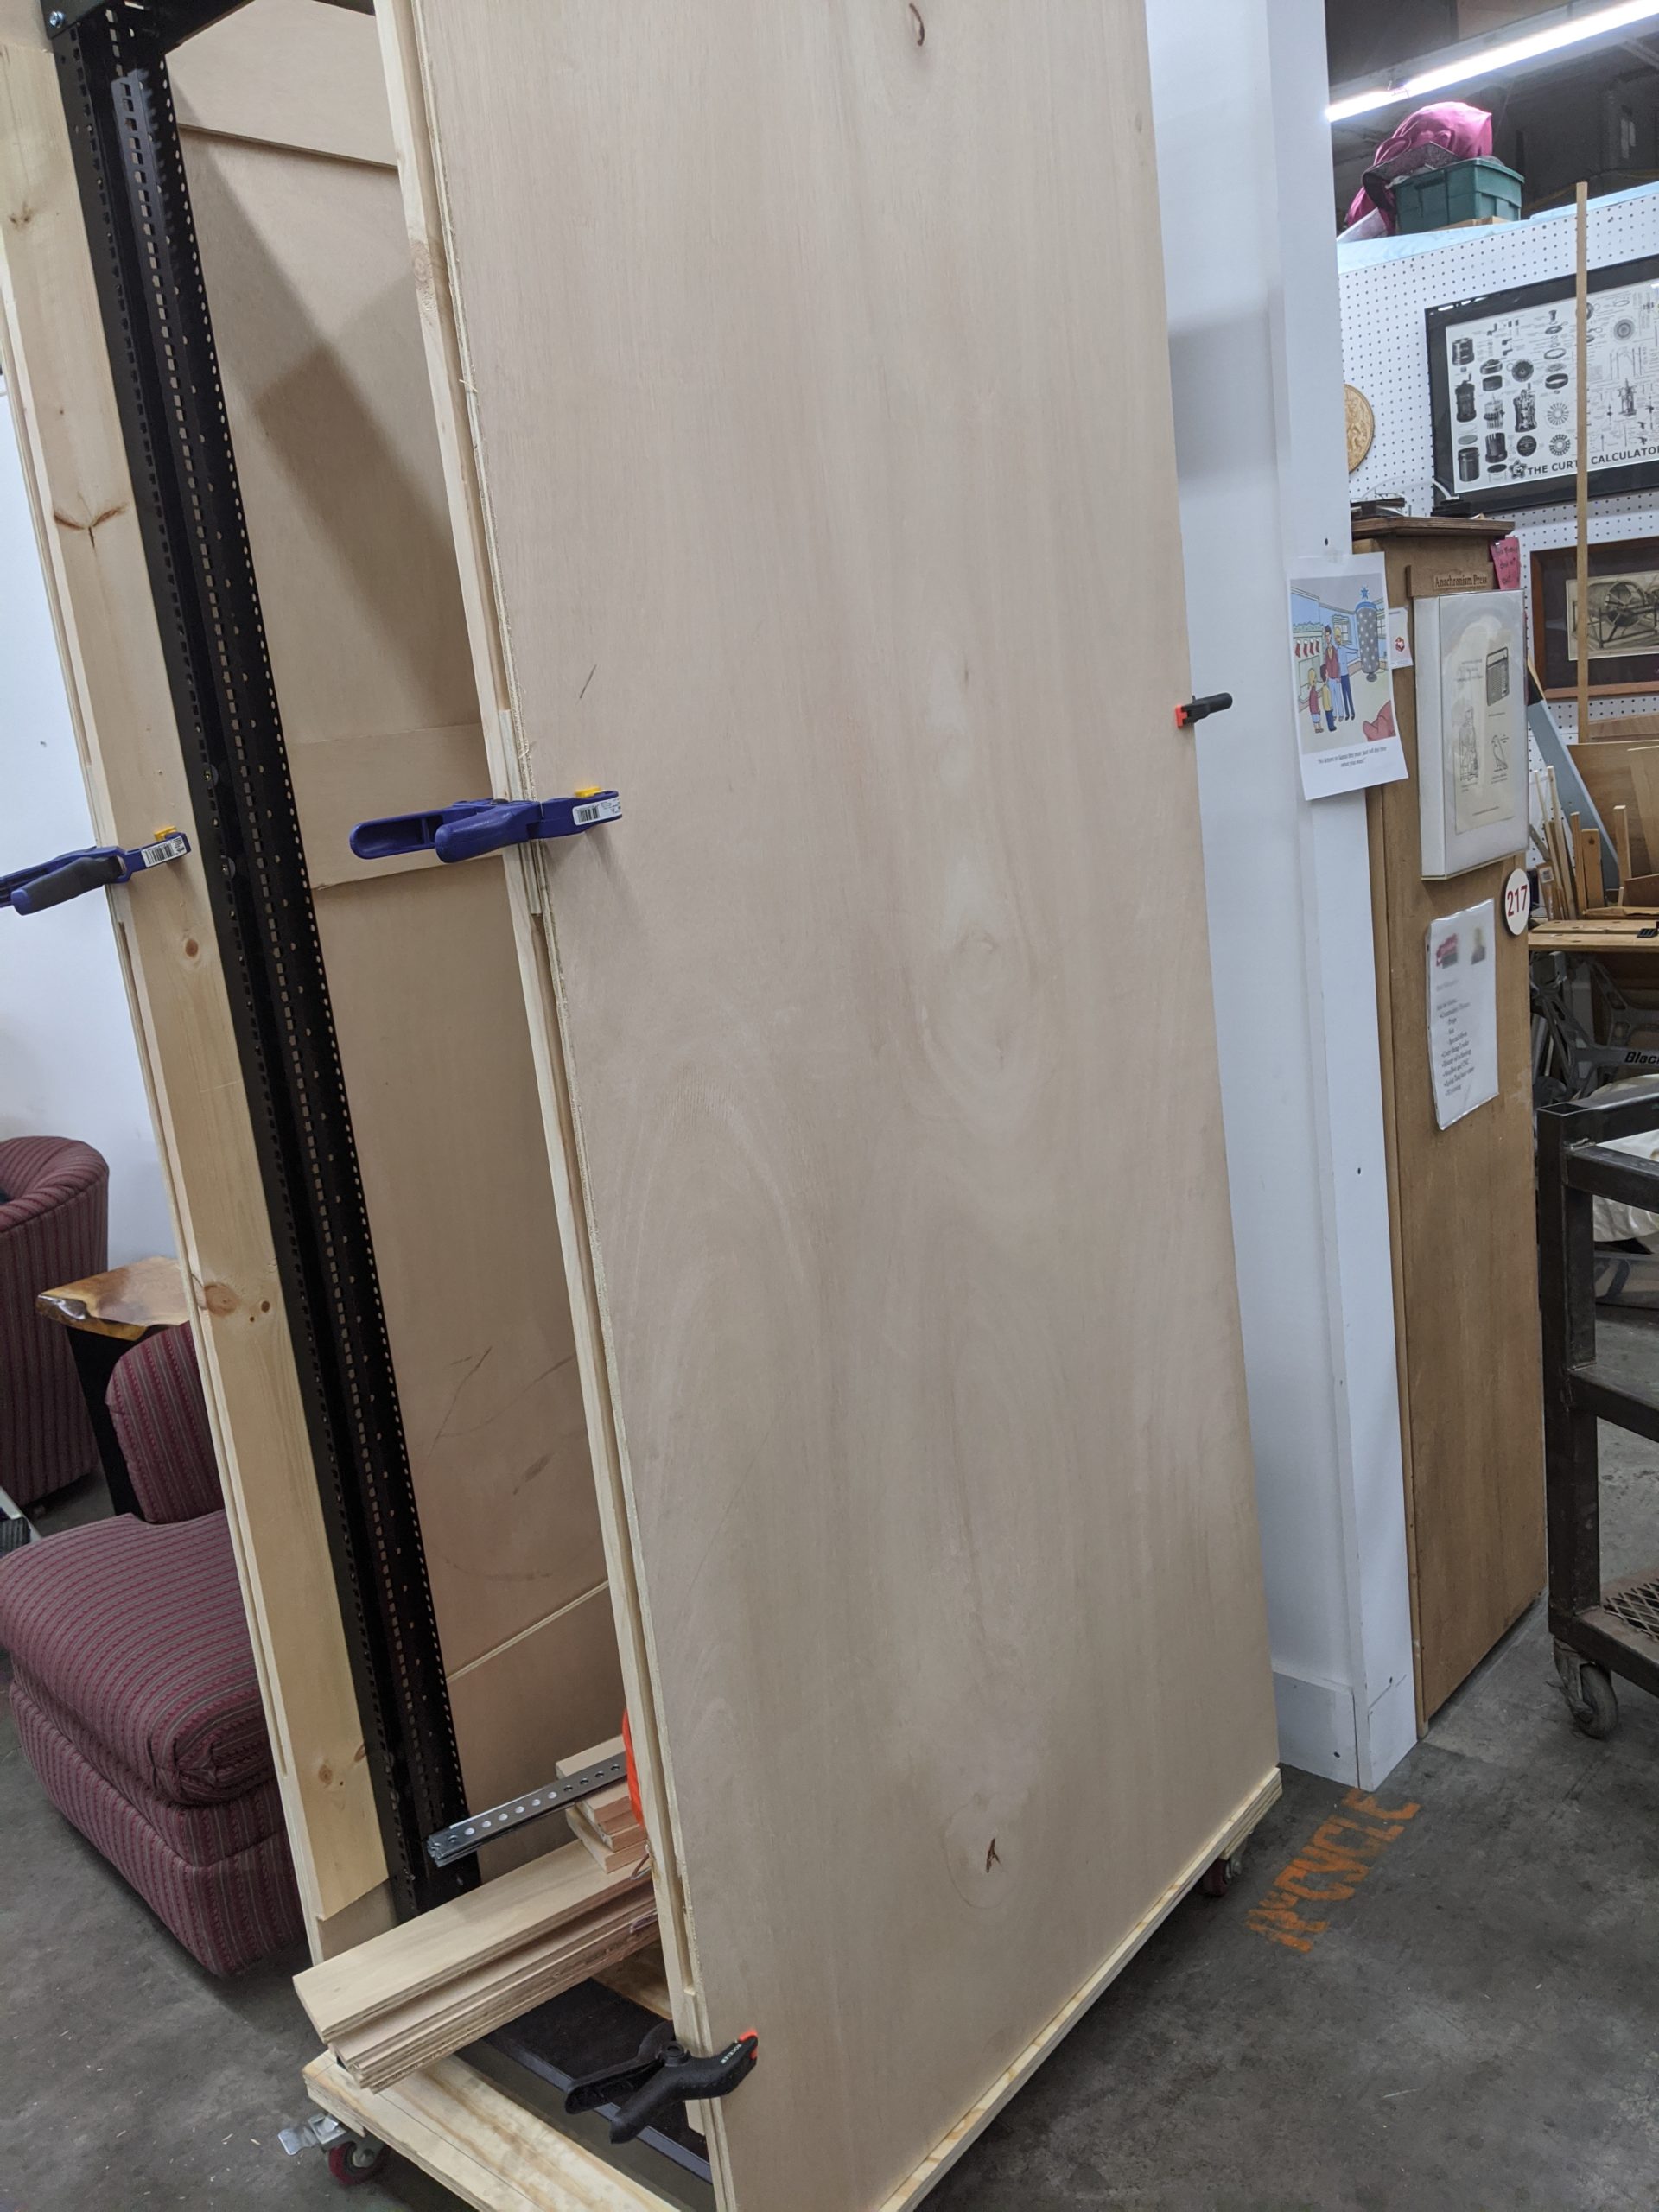
Despite all the fuck up’s, it finally started to look better and was very sturdy at this point.
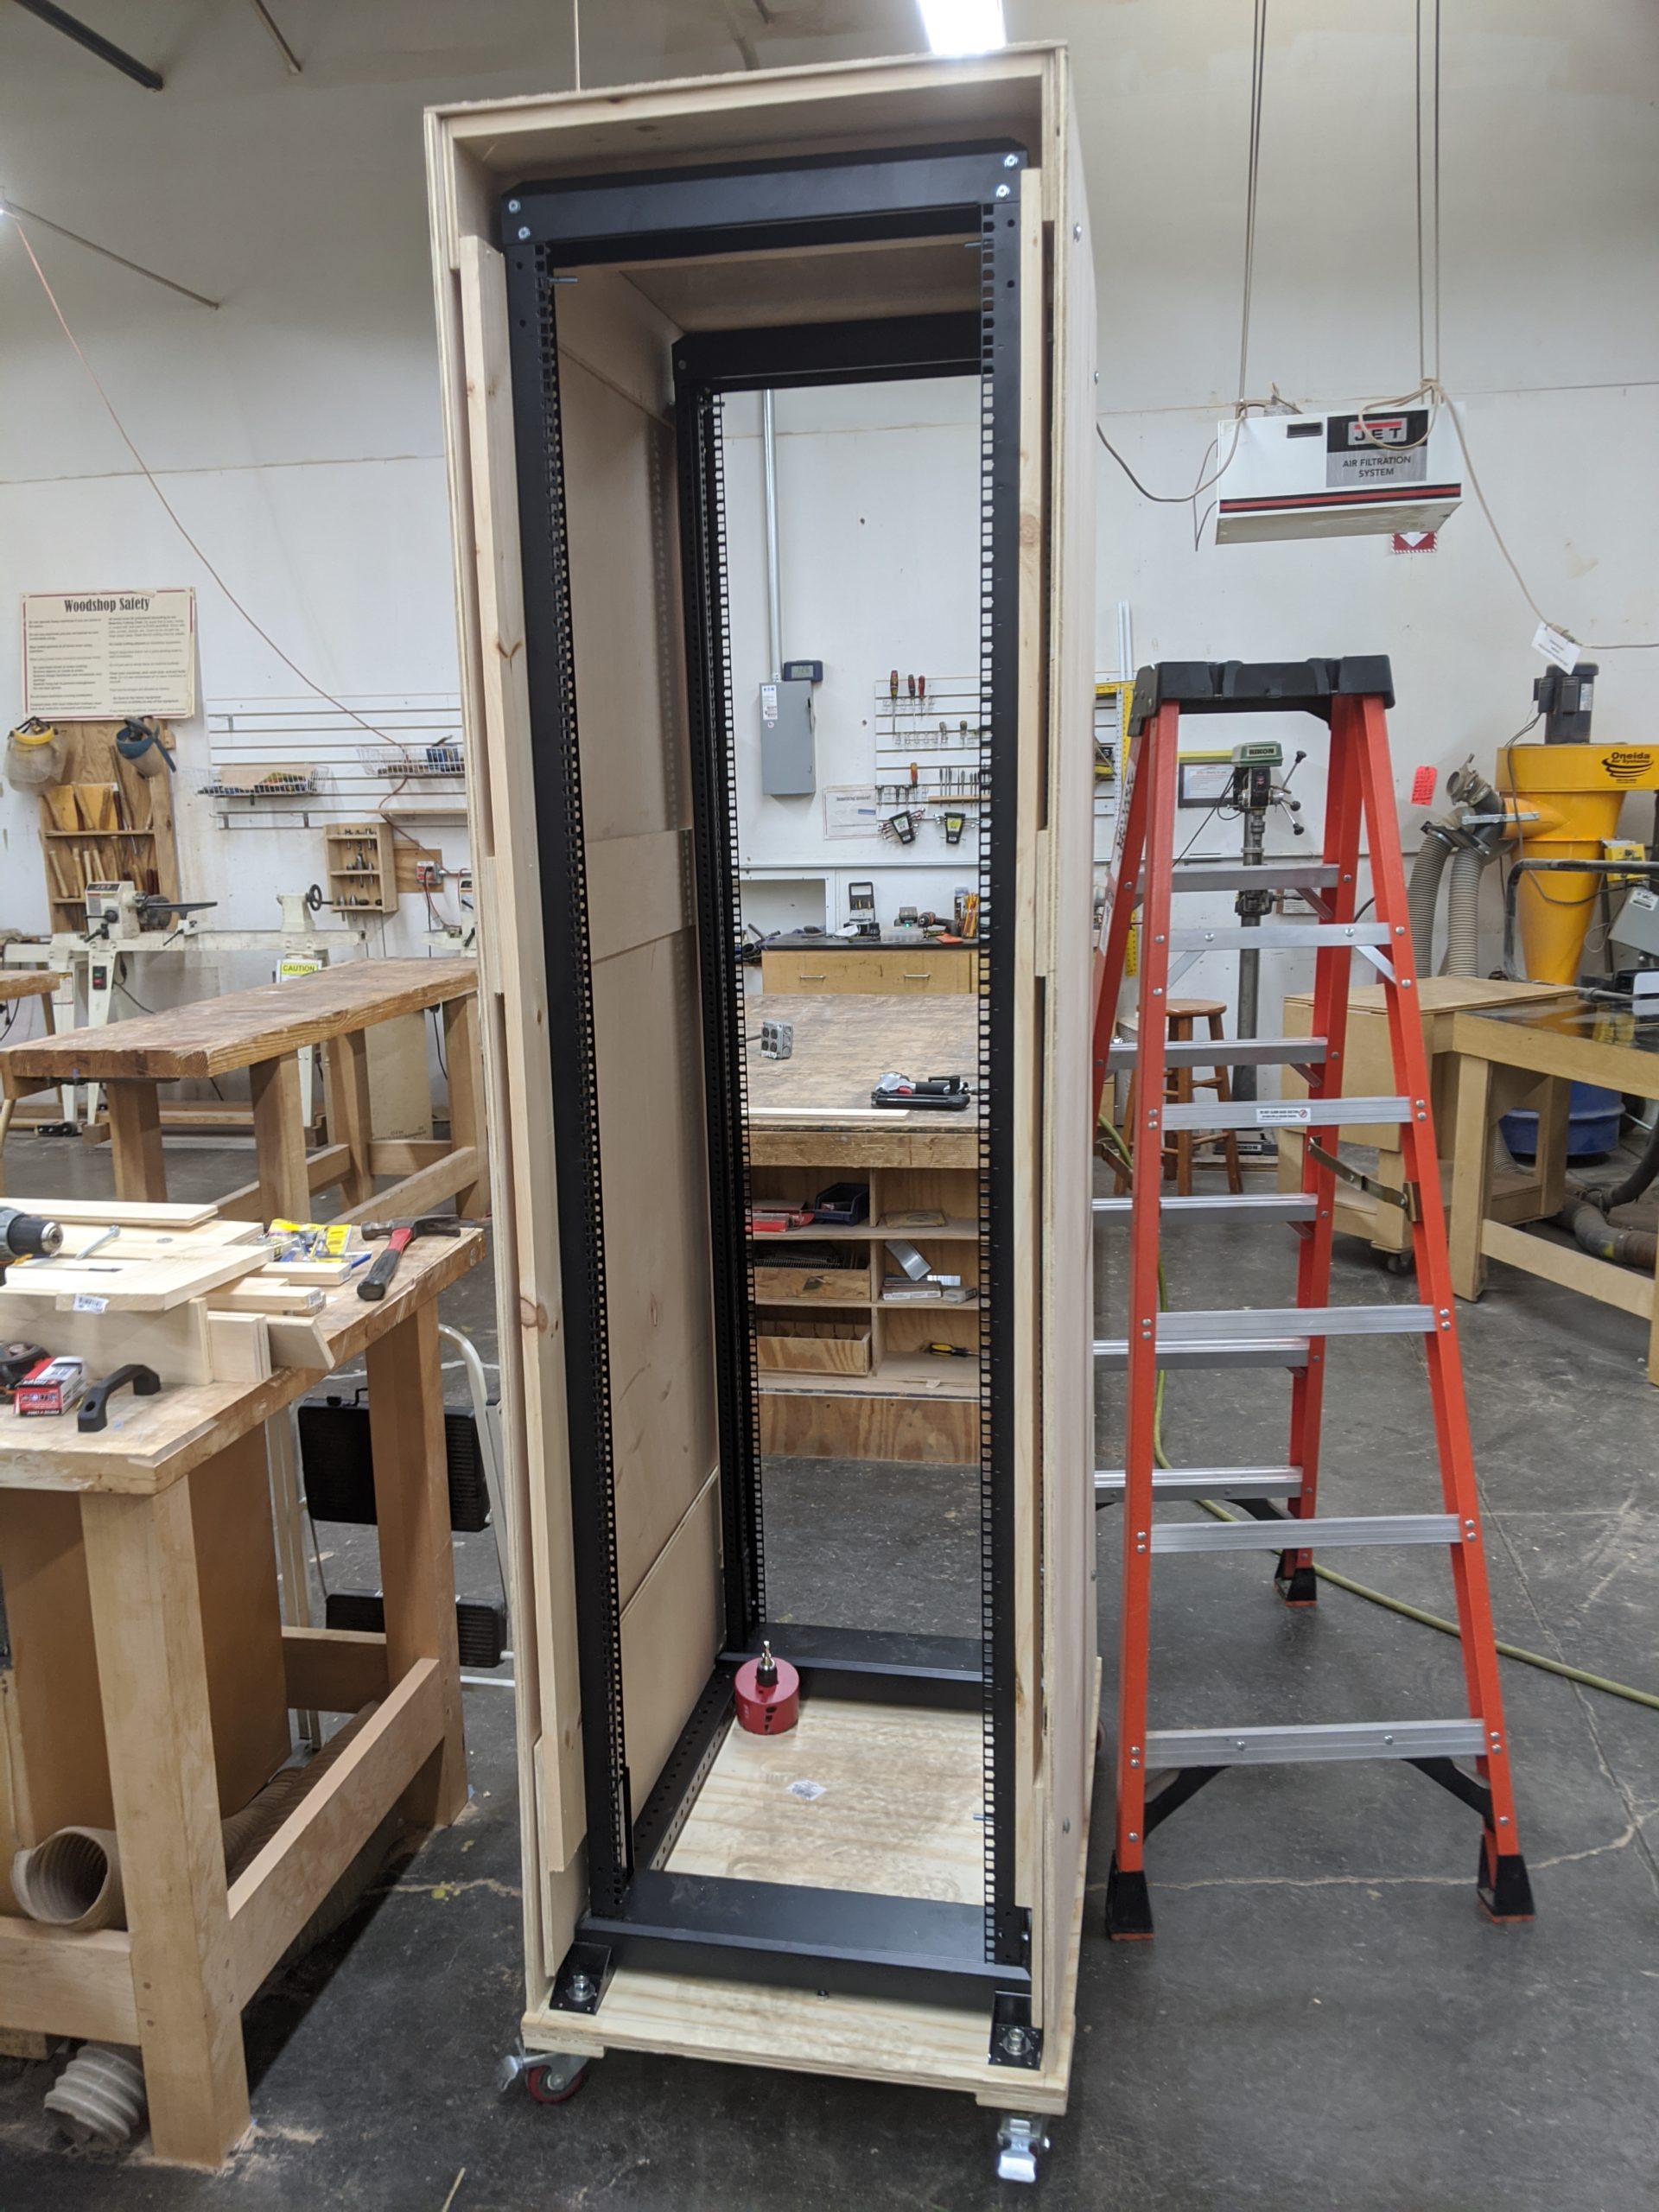
Next, I added an entry point for cables at the top and bottom of the rack and called the walls “good enough”.
The Door
At first, I was very happy with the doors. Until I built them wrong and realized airflow was an overall disaster. So I had to go back to the drawing board to design new doors with a giant filter in the front that is washable/replaceable.
Terrible idea 1: Don’t make solid wood doors for a rack and not design proper airflow into them.

Terrible idea number 2: Fan mounted into the doors. I really wanted this to be like Star Trek. I wanted the doors to come right off for access. But with cables leading to fans plus my massively overthinking how can I make this work, I tabled this idea for another time.
The Back.
I wish I took more pictures as I built this thing but didn’t. 🙁 I’ll be better at this in the future.
DESCRTIBE THE BACK
So I learned a bunch in making this and I would do it again going in knowing what I know now. I still plan to make a Star Trek rack and maybe I can still do it to this one. Like I said though, it all worked out in the end and is not a bad looking rack if I do say so myself!